Tuesday, January 3, 2012

Trying out Trichem

Last year, I discovered my love of painting, especially umbrellas. For the longest time, I painted umbrellas for friends. My favorites are still the umbrellas I painted for my girls: a peacock for Elizabeth and a heart design for Haley.


To write the names, I found Paint tubes the best, but unfortunately the only paint tubes available in craft stores are oil-based. I happen to be allergic to these. My mom bought all my paint tubes from me when I discovered this. Back in the day, Trichem was a major supplier for paint tubes. This is a home party consultant business type of product, so it's not available in stores.


Most peers my age seem to have never heard of trichem, or if they have, they know it because their mother or grandmother did it. To be honest, when I think of trichem products I think of silk screen looking shirts like this:


Meh. I can see my grandmother wearing this, maybe even my mother (possibly). Infact, looking at Trichem's website even makes me uninspired. Thank goodness that I have imagination and desire to decorate beyong the average box t-shirt.

The great thing about trichem is their paints are all water based (no odors) and safe to use. I have to say, I'm thoroughly addicted.

I got a bunch of tirchem products for Christmas, and I'm ordering the instructor kit soon, to start holding parties in march. I'll be posting weekly updates on business with trichem, but one thing in my head is clear: It's time to bring trichem to a younger generation in a way they can appreciate it!

Monday, January 2, 2012

Hold the peanutbutter Birdseed blocks

Over the course of the holidays, I struggled to decide what the children would give to their teachers for Christmas. Last year I didn't do a single thing, as I was totally wrapped up in my own little drama. This year I really wanted to make an effort.

I really want to buy the wooden birdhouses at the dollar/craft stores and stick bird seed on them, and then shrink wrap, but my wallet was already screaming and giving all of Haley's teachers (she has nine at the school and two at the center!) plus bus drivers and assistants (five including Eli's driver), I was getting close to shelling out $20 just for the houses alone.


Another problem is the fact that most birdseed feeders involve peanut butter. Both of the girl's classrooms have a strict no peanut butter rule. So after a little research (and a lot of convincing myself) I settled for taking a leap of faith and omitted the peanut butter from a recipe which included coconut oil.


Coconut oil, for those who don't know, looks like white shortening, but has a grainy consistency. At first I attempted to use half oil, and half birdseed of equal measurements. Basically you melt the oil and mix the birdseed in. The problem, as it turned out to be is birdseed is very heavy, and you will wind up with oil on the top. I just kept adding birdseed when I saw more oil.

We tried shaping  by placing foil sheets around the edge of each cookie cutter. It worked for the most part, but I wanted something faster so I settled for muffin tins after the first try (The thought has occur ed to me that next time I will use my silicone jello shapes, as they will be more decorative).

Once you fill up the holes part way I put a looped ribbon in the center and layer more seed mixture on top, keeping the ribbon in the center, and upright. Once filled, leave in the freezer for 20 mins. Then just like jello, run hot water on the bottom of the pan, and pull the feeders out!


The oil doesn't firm up right away, so you can easily let this cool til kids can safely handle it. The end result, was cheap, I spent $10 and was able to give all teachers a gift. These are meant for outside feeders during the wintertime, as heat will melt the oil. I plan to make more for valentines day, now that I have the silicone jello mold idea.

Sunday, January 1, 2012

Pretty pretty peacock

Last year I discovered a wedding theme craze of peacock feathers. Does anyone else find it ironic that peacocks mimic the attributes of bridezillas? I do anyways. Still there is something very alluring about a peacock themed wedding. I've been doodling peacock designs for the release of my peacock items coming later this year, but while those are still in the beginning of development, I've been researching previous peacock themed events.

I must say, that I've seen some gorgeous peacock themes. I've also seen some horribly lousy ones. Peacocks are such a popular idea that there is much to choose from. While most items are beautiful by themselves, they can be ruined when your theme doesn't balance with your color palette. Here's some tips to make sure your peacock theme remains elegant and graceful.

1. Color scheme: PLEASE stay true to your color scheme. If you want the peacock feather to be predominate, peacock blue and green should be our predominate colors with accents of brown. Should you use purple (which is very pretty paired with peacock blue) make sure it remains an accent, and not the main color.

On the other hand, if you want a purple and blue wedding (or any other color), the feathers should become the accent. Don't throw a peacock feather in everything; you'll be adding too much competition.


2. Don't go feather overload. Honestly, don't kill 60 peacocks just so you can have feathers at your wedding. I really don't want feathers in my cake, or every piece of stationary that I open.


3. Bridesmaid dresses: If you are going to make your bouquets from peacock feathers, here is the part where you can break your color scheme of blue/green. Blue dresses will complement, but purple or brown (black) dresses will make your bouquets pop.

4. Make sure all your vendors are getting the correct shades of your color scheme. Remember plum purple can mean one thing to your florist and another to your baker. Bring a color swatch for every vendor so they know exactly what you're planning.

Peacocks are beautiful and elegant creatures. It's not a wonder it is popular choice. Stayed tuned for my favorite peacock themed treasury on 1/15/12!

Monday, December 5, 2011

Happy Holidays from My Family!

I really dread doing family pictures.  I really have a appreciation for having them, but making them....that's something entirely different. Scheduling an appointment, getting the children dressed up, loading them up, trying to make them smile, having to come back and pick up the prints.....ugh......

Not to mention that Haley had extreme issues with taking photos in the past. As a baby, she wouldn't even respond to her name, so most of her pictures were looking off in some other direction, not really smiling. By the time she was walking, I was just happy to have her visible in the photograph.

I learned to lower my expectations. My husband and I talked about having a professional photographer do our photos, but in anticipation of a repeat of our last family photos (were only the manager was able to get all three kids together!) we decided a milder environment family snapshot was all we could handle.

Surprisingly, it went well, once I set everything up. I still don't know anything about photography, and I knew the pictures would be dark (our living room, the brightest room, isn't the best). I am pleased to say all the kids posed for the camera. The girls didn't really smile, and Haley kept slouching. But there is five of us in the photo, and it wasn't stressful...so I am very happy.


Maybe next year we'll do professional, since the children did so well. Happy Holidays!

Friday, November 25, 2011

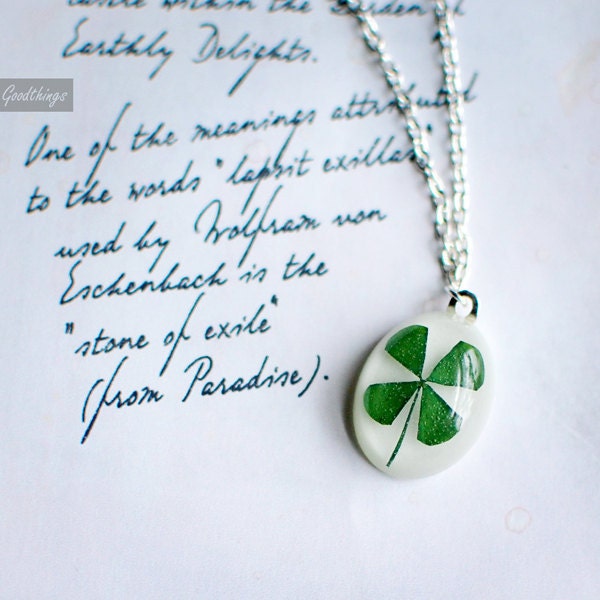
Why a real clover isn't REAL

I am about to save you. Be careful not to blink, because you'll miss it.

If you search for four leaf clover jewelry, you can easily find online. Well, maybe. Many sites sell 'real four leaf clover jewelry': www.fourleafclovergifts.com , even, amazon.com has them! But here's the dirty truth.

Many of these 'real' four leaf clovers are not who they say they are.


But there are real clovers out there? So who are these impostors? How can you tell if they are real or fake?

For starters, these impostor clovers are in fact botanical. In truth they are not from the clover family (they are ferns), but these impostor clovers naturally grow four leaves. See? Told ya I'd save you. I'm saving you from buying an unlucky clover. The most common type used for clover jewelry is the water clover.


You know this plant is harvested by some underpaid foreign laborer, dried for several weeks, and then packaged and sold to crafters, or manufacturers. A few days ago I paid a visit to micheals craft store, and I was disgusted. In the pendant section of the jewelry aisle, hung two different types of pendants with this clover in them.

Now, I'm not saying if you just want the look of a perfect clover that you can't buy these by any means. I am however, irritated by the fact that people try to pass these as 'real'. I spend my days crawling over white clover searching for the true lucky clovers, earning less than minimum wage. It's rather insulting that some just effortlessly collects these to pass of as the real deal.

So how do you tell, if you interested in a real clover? Well, this is not always the case, but here's a few possibilities.

  • The clover is perfect portions. I have found some real clovers that are perfect, but they are few and far. If it's a perfect, raise an eyebrow.
  • The clover has color. Clover with red edges are not white clover.
  • The price. My jewelry is really cheap compared to other real clovers, but I'm not making enough off them, and I will charge more when I get better at resin mixing. But rest assured, if it's $20 or under for a necklace, they must have a surplus of those bad boys.

So whether you do or don't care about getting a real clover, It's nice to know the difference.  Now I'm done being superhero. It's your turn. Go save someone else from falling for the 'real' clover claim.

Thursday, November 24, 2011

So many things!

First I want to wish you all a happy thanksgiving! I have so much to be thankful for, so much in fact, that I haven't had time to blog much!

So, I'd love to tell you about everything that's going on, but I do have a 12 pound turkey to cook, rolls to bake, and mash potatos to mash!  So instead, I'm sharing a little family tradition we do for thanksgiving.

Every year, we go to a paint your own pottery studio. I let the kids pick out something small to paint, and I pick out a dinnerware piece to serve our thanksgiving meal on. Two years ago, I made an attempt to paint one at home, and it failed, as I did it with the wrong paint. The following year (last year) we made a turkey platter.

This year, we made a mash potato bowl.  Last year, I forgot to add the year we made the piece, so I remembered to do so this year. All of the dinnerware will have hand print turkeys. I'm hoping though that we will be able to do some pie dishes at some point instead of turkeys, we'll do apple and pumpkin palm prints.


The idea is when the kids are in high school and thereafter, we'll have a full set of serving ware and a memory to go with each piece--a memory to be thankful for.

Thursday, September 8, 2011

Poll! Unfinished, or Looks good?

I'm facing a small delimma.

I have these two charms, made from princess buttons. I'm really attracted to the one on the top.......


UTNIL.....you flip them over.


See what I mean? Niether of them a really appealing, but the glitter looks better then the back of the modified button.

Any ideas? Do you like the glitter better? Should I add something  tottally different? Not sure where to go from here....